Wednesday, February 24, 2016

My Planner


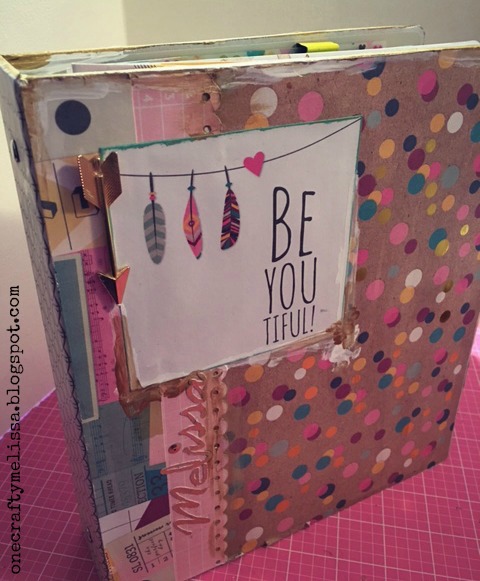
This year I joined the Documented Life Project 2016. It's where Arttothe5 sets up challenges each week for you to do to your "unplanner". I do more paper and scappin type of pages now, but maybe later I will do more "artsy" pages.  They also have a FB group page. People post all of their "work" and it's really neat to see all the creative things people do with their "unplanners"!  I started off with a 3 ring binder with dividers. I covered mine with Simple Stories "So Fancy" paper. I used Arttothe5 weekly & monthly view planner pages but made a few modifications for my own planner. I need to keep a detailed schedule at work, so I modified the weekly page. I imported the weekly planner page into microsoft power point and made a grid for daily hour-by-hour time slots. I drew black lines to mark off areas and to make the sections more defined. I needed a place at the bottom of my work day for night time stuff so I drew another black line. I LOVE powerpoint..I use it for journal, editing pictures and doing planner pages. The program is great because you can place items anywhere on the page. I also created three other journal pages for each month.."goals", "reflections" and "right now" pages. I saved them on my Google Drive so you can download them. It's SO fun to work on each weekly challenge and journal about my week! I've also noticed I sure do have a lot of styles..I"m so glad I can have a different style for each week :) Here is the link to the planner journal pages I created...                                                  


I added a little bit of paint, a gold arrow and cut my 
name out of my Sihouette in gold paper. 
Did I mention that I love gold? 

Here's an example of my "Refelctions" journal page.

In honor of The Walking Dead premier (I'm a big fan!)The weeks challenge
was "use shades of one color". I used brown..but it was
more fun to do TWD collage! 

Friday, September 25, 2015

BRCA

I really like the "I AM" line by Simple Stories and decided it would be perfect to use on a picture I wanted to use in my scrapbook about my BRCA journey. I belong to two BRCA FB groups and find them SO helpful and supportive. When someone posts that they are going to have a surgery the comments consist of well wishes and one comment I see all the time is "you got this". The Silhouette was perfect to create it on!

Sunday, September 6, 2015

Shaker Box for Cards or Scrapbook Page Embellishment


 I have consumed lots of cold drink this summer from Starbucks. Their cups were so cute..decorated in typical cool Starbucks fashion with flip flops, boom boxes and sun glasses. Half way through the summer I had an idea to take the cool image and make my own shaker box. I only wish I would have gotten the idea sooner..I could have saved a lot more cups!


Tuesday, June 9, 2015

Watercolor with Tim Holtz Distress Ink


I love distress inks and when my aunt visited recently I got to play with her mini Tim Holtz distress inks. My aunt is a wonderfully good artist and makes beautiful cards. She sent me a few really cute cards in the mail when I was recovering from my surgery. I asked her if we could make them while she visited. So, she brought all her goodies so we could spend time making them. She diecut some cute butterfly's and then I used her wet paint "Hello" stamp from Simon Says. I stamped the distress ink color onto a stamping block then used my water pen to pick up the color and brush it on the card and butterfly. The water pen made the color really easy to brush onto the paper! I also punched out a bunch of mini butterfly's out of watercolor paper to "paint" later.  :) 

Happy Creating,
Melissa 

Sunday, May 17, 2015

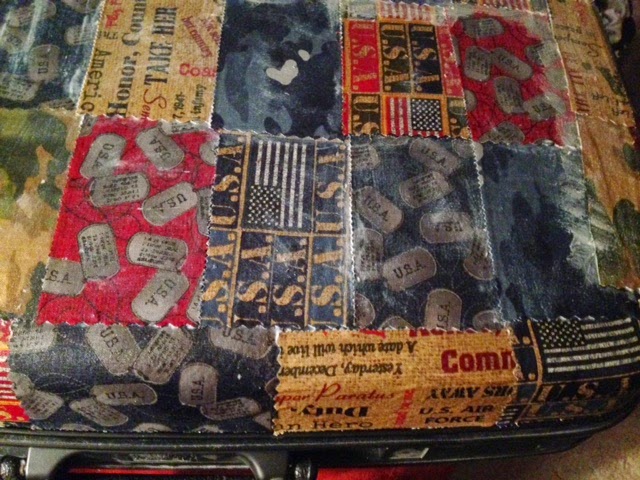
Repurposed Vintage Suitcases


I made my first Mod Podged suitcase years ago and have been stock piling vintage suitcases ever since. Whenever I am out thrifting I keep my eyes open for nice old hard sided suitcases. There's a few things I look for:
1. Good outside surface free of dents.
2. Working locks (bonus if there are keys!).
3. No weird smells (old stuff can have smells that are hard to get rid of).
4. Inside lining intact and free of rips.

Once you have your suitcase you'll need a few other things:
1. A water based matte sealer like Mod Podge ( Biggest jar 32 fl oz $11 at Walmart) There are also recipes to make your own on the internet. Haven't tried any of them as I am all about saving time at this junction in my life. I will definitely try them later!
2. Big paintbrush or foam brush. I use a large bristle paint brush.
3. Fabric. I only use good quality cotton fabric. I used a polly blend once and when the fabric dried it showed the suitcase color through. It was not pretty. The most time consuming part is cutting the fabric into 6x6 squares. I used pinking shears at first, then transitioned to a rotary tool to save time. You can cut a straight edge but you will have lots of strings when the squares fray. To save even more time/energy I now just use pre cut fabric squares that come in Charm packs. They are a little more expensive but well worth it to me..all about saving time/energy lately. If you cut your fabric you will also need a large cutting mat, and ruler or quilters rule. These things make it much easier to cut straight even squares.
4. Paper towels or wet wipes. Just in case you need to wipe up a drip or dribble.

I am recovering from a surgery I had in April so I have been covering the suitcases while sitting in my recliner watching TV.  I don't cover me or my work area, but would suggest doing so. Once the sealer dries it's pretty hard to remove. Here's my process...

1. Brush on the sealer in the space for one square. I start with the the boarder first. I complete the whole outside boarder, then work my way starting at the top from left to right downward. Kind of like reading a book.

 2. Lay the piece of fabric on the sealer. Press down with your fingers to make sure the fabric is smooth. Brush on more sealer if you need to around the edges.
3. Brush sealer on top of the smoothed fabric. You don't want to have gobs of sealer on top but you don't want it to be dry either. Just enough to cover the fabric, should be slightly sheer not solid white from the sealer.

Then repeat steps alternating the fabric patterns until one side of the suitcase is completed. I usually let it dry overnight and then do the other side. It gets really messy trying to work on the other side while the one side is wet. It doesn't look that great when it's wet, But when it dries it will look really nice.

I created one for each of my children this past week. I am going to put all their baby mementos I saved for them in it. You can also use them to store crafts or art supplies. I made one and put a baby shower gift inside.
The uses are really limitless!
Happy Creating!


Friday, April 24, 2015

Free Vintage Ephemera Printables or Clip Art


Vintage Ephemera

I was sorting/cleaning before I had my big surgery and realized I am a collector. Collector of almost anything old. I get it from my Dad, he was a collector too. He would open his drawer of old collected treasures and one by one we would examine each item..he would tell me how he acquired the old thing and usually there was a story or two. Now, I have my own drawer of treasures and over the years my collection has grown. I usually have two categories...Ephemera paper (flat) and Ephemera Misc (bulky stuff). When I am out and about at garage sales, thrift stores or antique shops I always keep my eyes open. You just never know what you might find. I also look on eBay. Sometimes you can find paper ephemera or junk drawer lots for cheap. It takes patience with eBay, but the payoff can be worth it. I took some of my paper treasures and scanned them so I could keep using them in my mixed media and scrapbooking projects. You'll find the links below..I hope you like them as much as I do! 

enjoy,
melissa


Saturday, April 18, 2015

Circle Journal Pages and Name Tags

This was for my last swap on the 2Peas FB Group swap. I decided with all my surgeries I didn't want to have deadlines and projects still due while I was trying to heal. The Circle Journals theme was each persons state. Each participant made a page about their home state and city. I started off by making a collage in PicMonkey. I added text to title each space in the collage. One the back side I listed my favorites as corresponds to the collage. I used My Minds Eye Cut and Paste paper and stickers. Silhouette US outline and Nebraska cutout. Also some washi tape and stamped black dots.